Posts

Final Project

Image
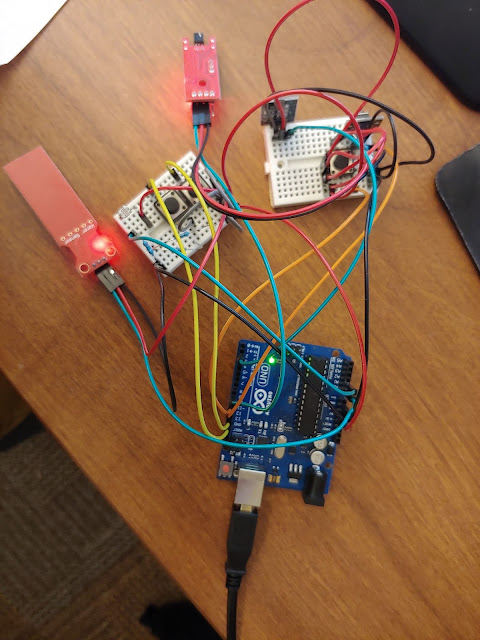
My project was done with  Zack Dunham  and  Tristan Marshall The goal of our project, feelings of history, was to show history from a new angle by using technology to create an interactive experience. Our initial brainstorming was inspired by technology like the hololens and by statistics about how little the average citizen actually knows about history. The prototyping process took the vast majority of our time as we researched and tried to implement different ways for the arduino  to track its location and communicate wirelessly. The first method we tried for positioning was to use an accelerometer to measure the acceleration and extrapolate from that, which didn't work because as soon as a single input was lost the position would be so incorrect there was no recovery. Next we researched a few things including: a GPS chip (doesn't work because the best resolution we could achieve was about 12 meters), using the latency of the RF chips to measure distance (doesn't work

Final Project Proposal

Feelings of history is our interactive history experience. Here are links to the PDF and PPTX versions of our presentation. https://drive.google.com/open?id=19IjNT0PVCze2-3mP0LlIUWTbBMsmDICl https://drive.google.com/open?id=1PEe-G5sSvwXu1Lx9hSW0IHDq2DQlgjmI

Reading 2

Ambiguity as a Resource for Design This article is talking about the benefits of ambiguity in your design and how it can lead to more thought or unexpected results. Ambiguity is often the first thing we try to stamp out of any interface, the user should know exactly how to use it and what to do with minimal confusion. If an interface is ambiguous it is hard to use and bad. However in art ambiguity is often what provides the creative depth that makes it so engaging, my grandmother was an artist and she would often talk about how if you were just painting objects you were making art but you were not creating Art. Without ambiguity the piece turns into more of a display as opposed to a piece of art that draws the viewer in. I think adding ambiguity to some things like the slogan bench is an interesting way of transforming very basic things into a more artistic expression is more effective as opposed to just putting up signs because it causes the user to actually think about the piece a

Project 2 - Prototype for an alternative interface

Image
     My vision for the second project was to come up with a way for people to share experiences through non visual mediums. I ended up choosing sound for the medium because it seemed the most practical and varied way to convey what I wanted. So much of what we share today is visually based even if it does incorporate sound into it, like videos of concerts or vlogs for instance. My goal was to simply take the inputs from person A and convey that data through sound to person B. The device would be wearable and measure a variety of environmental factors (wind, temperature, sun, rain, humidity) but also measure biological factors (heartrate, recent movement, body temp, brain waves) in order to convey how the user was feeling as well as what the environment was like, with the output sound taking the form of a procedurally generated song. This could serve a variety of purposes: an installation with two closed booths that contain environmental controls, a platform to share experiences around

Exercise 4 - Serial Communication

Image
Part 1 The first part of the exercise was fairly easy to complete as I've been using the serial window as a console for debugging sensor values for the past several exercises. I set up the button example with a photo sensor and logged both values to the console. Part 2 Part 2 was a little more difficult for me and I used several tutorials to help me understand the communication aspects of it.  (1)   (2)   (3)  The sketch I ended up creating works by having three buttons in processing that are red/on when the mouse is over them and black/off when the mouse is not. Each button corresponds to an LED on the breadboard. This section involved a lot of repeated code for me so next time I am going to try and create a reuseable button or element to make it faster and easier to iterate on. Part 3 Part 3 was a solid extension of the concepts from part 2. I used 2 potentiometers and a light sensor to control this sketch which then sent the instructions back to the Arduino. The f

Project 1 - Switches and Analogs

My post will be a little light on fritzing pictures because somethings wrong with my installation. As a summary I attached a joystick (2 analog inputs) to control the brightness of two LEDs separately. The two LEDs are above a light sensor (1 more analog input) that detects the changes in brightness and uses that to turn either a red or a green LED on. For the digital inputs I used two buttons to control which one of a 4x4 grid of LEDs was on. Getting the analog circuit to work was mostly an exercise in sensor calibrating and value mapping. To get the Joystick to output a value from 0-255 instead of ~500 to 1023 in one direction and  0 to ~500 in the other took some creative math. I ended up taking the value of the joystick in the setup method and subtracting that then taking the absolute value and now the joystick increases the brightness no matter which direction you use it on. Getting the light sensor to detect the change from 2 LEDs was more of a pain. I had to take the value in